How to use payment processing on MiniMate
To use credit card processing for payments on MiniMate, Prism will need to enable the Credit Card option for your users. Once this is enabled, the handheld user can follow your business workflow on MiniMate for tickets.
When the user gets to Step 3 on MiniMate, they will proceed to process the payment. First, the user will obtain a customer signature.
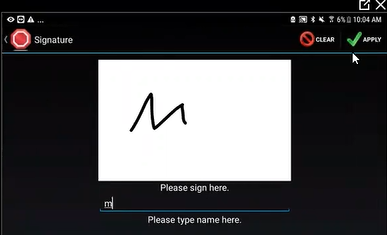
Once the signature is captured, they can click Apply. This will navigate the user back to the Payments Screen. From there, they can then click on the PMT button.
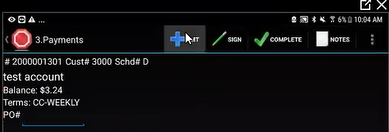
A pop up will open on the screen, which the user will now see an option for Credit Card.
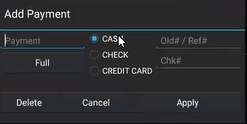
The user will either enter in the Payment amount or select Full, which will populate the full amount due. Then the user can select Credit Card as the payment option and click Apply.
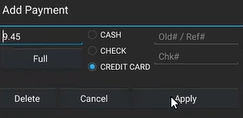
A new screen will open on MiniMate. If a card has been saved to the Customer profile in ServQuest, the card will be listed on this screen.

If no card exists or the customer would like to use a different card, they can click Add in the upper right corner. A new screen will open where the user can populate and review the billing address details.
- Enter Name on Card in Name field
- Enter card number in CC# field (can be debit or credit)
- Enter the expiration date of the card in the field below CC#
- Enter the CVV code in the CVV field
- Verify Billing Details populated automatically – if anything should change, update these details here
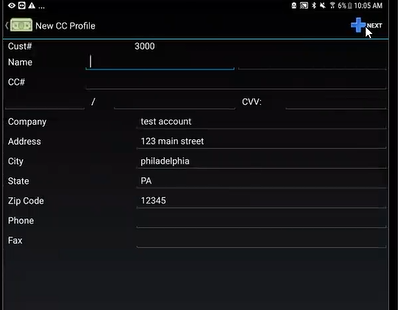
Once the details have been entered, the user can hit Next, which will proceed to the payment confirmation. A pop-up message will appear outlining the charges and to confirm you wish to continue.

If a surcharge has been configured on the Customer record in ServQuest, an additional fee will apply.
The user will select yes if the charge is approved and then can proceed to Complete the ticket on MiniMate per business workflow processes.
